23. Working with Instruments and Effects
Every track in Live can host a number of devices. These devices can be of three different sorts:
- MIDI effects act upon MIDI signals and can only be placed in MIDI tracks.
- Audio effects act upon audio signals and can be placed in audio tracks, return tracks, and the Main track. They can also be added to MIDI tracks as long as they are placed after an instrument.
- Instruments receive MIDI and output audio; they can be placed in MIDI tracks.
To learn about a particular device and how to operate it, consult the Live Audio Effect Reference, Live MIDI Effect Reference, or Live Instrument Reference chapters.
To learn about creating and using custom groupings of instruments and effects, check out the Instrument, Drum and Effect Racks chapter.
Further information about track types in Live can be found in the Routing and I/O chapter, including information on using return tracks to distribute the effect of a single device amongst several tracks.
You can get hands-on with devices by assigning their parameters to MIDI or key remote control.
23.1 Device View
The Device View is where you insert, view, and adjust the devices for a selected track. You can double-click a track’s title bar to view its devices in the Device View, which appears at the bottom of Live’s window.

By default, either the Device View or the Clip View can be used at a time depending on whether a device or clip is in focus. If you want to tweak device parameters and edit notes or samples without switching between views, you can stack the Clip View above the Device View.
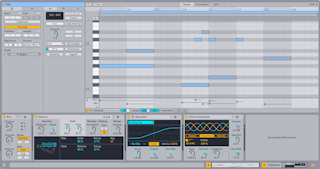
Use the toggles next to the Clip and Device View Selectors in the bottom-right corner of Live’s window to expand both views.

You can also use the keyboard shortcuts CtrlAlt3 (Win) / CmdOption3 (Mac) to show or hide the Clip View and CtrlAlt4 (Win) / CmdOption4 (Mac) to show or hide the Device View.
To save space in the Device View, a device can be collapsed by double-clicking its title bar or by choosing Fold from the title bar’s context menu.
23.2 Using Devices
Live’s devices can be accessed in the browser. The browser’s sidebar contains labels for built-in devices, Max for Live devices, and third-party plug-ins.
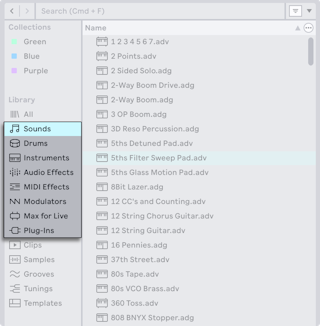
The easiest way to place a device in a track is to double-click it in the browser, which adds it to the selected track or creates a new track if one is not selected. Alternatively, select a destination track by clicking within it, then select a device or preset in the browser and press Enter to add it to the selected track.
You can also drag devices into tracks or drop areas in the Session and Arrangement Views, or into the Device View. Dragging a sample to the Device View of a MIDI track creates a Simpler instrument with this sample loaded.
If you want to use an external input signal to feed a track in Live, the track’s Arm button in the mixer must be activated in order to hear the input through the devices in the track’s device chain when using the default Auto monitoring setting. On MIDI tracks, this is normally activated automatically when inserting an instrument.
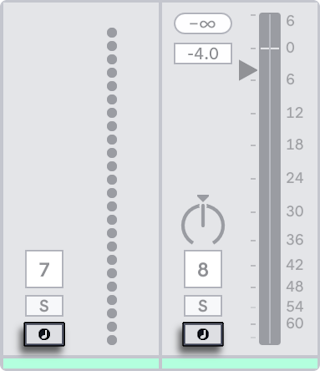
This is how you would play live instruments through effects on a track, for example, or use a MIDI keyboard’s input to play a track’s instrument. You can easily move from this setup into recording new clips for further use in a Set. If you have alternative monitoring preferences, please see the Monitoring section to learn how to configure these settings.
To add another device to the track, simply drag it there or double-click its name to append it to the device chain. Signals in a device chain always travel from left to right.
You can drop audio effects in at any point in an audio track’s device chain, keeping in mind that the order of effects determines the resulting sound. The same is true for a MIDI track’s device chain.
If you drop an instrument into a MIDI track’s device chain, be aware that signals following (to the right of) the instrument are audio signals, available only to audio effects. Signals preceding (to the left of) the instrument are MIDI signals, available only to MIDI effects. This means that it’s possible for a MIDI track’s device chain to hold all three types of devices: first MIDI effects, then an instrument, and finally audio effects.

To remove a device from the chain, click on its title bar and press your computer’s Backspace or Delete key, or select Delete from the Edit menu. To change the order of devices, drag a device by its title bar and drop it next to any of the other devices in the Device View. Devices can be moved to other tracks entirely by dragging them from the Device View into the Session or Arrangement Views.
Edit menu commands such as cut, copy, paste, and duplicate can be used on devices. Pasted devices are inserted in front of the selected device. You can paste at the end of a device chain by clicking in the space after the last device, or by using the right arrow key to move the selection there. Generally, devices can be placed, reordered, and deleted without interrupting the audio stream.
Devices in Live’s tracks have input and output level meters. These meters are helpful in finding problematic devices in the device chain: low or absent signals will be revealed by the level meters, and relevant device settings can then be adjusted, or the device can be turned off or removed.
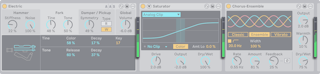
Note that no clipping can occur between devices because there is practically unlimited headroom. Clipping can occur when an overly strong signal is sent to a physical output or written to a sample file.
After reading about using devices in Live, you might find it interesting to look into clip envelopes, which can automate or modulate individual device parameters on a per-clip basis.
23.2.1 Device Title Bar
The controls in a device’s title bar can be used to activate or deactivate the device, save and hot-swap presets, create defaults, and open the device’s context menu.
Certain title bar controls are only available for some devices, such as the scale awareness toggle for devices that can follow a clip’s scale, and the Learn toggle for the Chord device.
Devices are turned on or off using their Activator toggles.
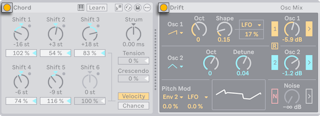
Turning a device off is like temporarily deleting it: the signal remains unprocessed, and the device does not consume CPU cycles. Live devices generally have no impact on CPU usage unless they are active. For more information, please refer to the Managing the CPU Load section. The Freeze Track command discussed there is especially helpful when working with CPU-intensive devices.
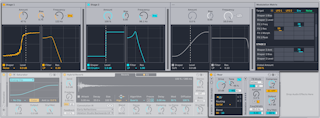
Some devices have views that you can expand above the Device View, such as the Gain Stage and Modulation Matrix sections in Roar and the Frequency Display in EQ Eight.
Devices with this kind of view have an arrow toggle to the right of the Activator toggle. Use the toggle to show or hide the view.
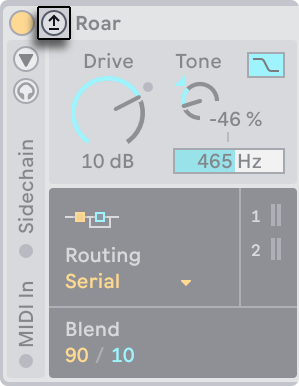
Some views can also be expanded within a device itself, for example, the LFO and Envelope Follower sections in Phaser-Flanger. This kind of view is indicated by a triangle icon in the device title bar.
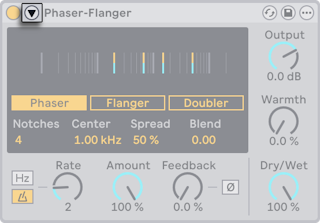
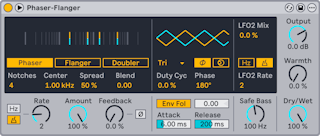
A context menu is available for every device and contains general editing commands such as Cut, Copy, and Rename. Some commands are unique to a particular device, such as the Mono Sidechain option in Auto Filter.
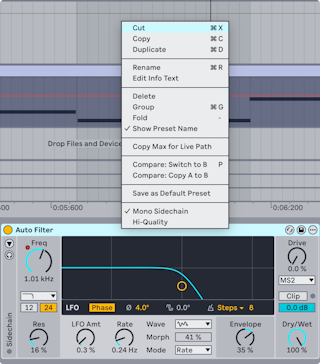
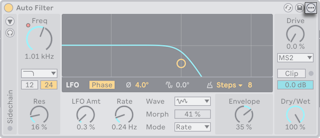
You can right-click a device’s title bar or use the Show Options toggle to open the context menu.
23.2.2 Device A/B Comparison
Every built-in Live device includes two device states, A and B, which can store separate parameter values. This lets you save and compare the changes you make when creating or editing presets. You can save an iteration of a preset that you don’t want to overwrite to one device state and continue experimenting on the other.
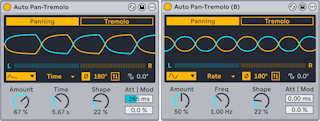
Using device states to compare parameter settings can also be useful for things like EQing and compression, where minor adjustments can make a noticeable difference. You can try out slight parameter variations to hear how they affect the resulting sound or check the changes against default values.
When a device is first loaded, its default parameter values are used for both A and B. Once you adjust a parameter, B retains the initial values, and any changes you make only apply to A.
To copy the current parameter values from the A device state to B, select the Compare: Copy A to B command from the Edit menu, the device’s context menu, or its Show Options toggle.
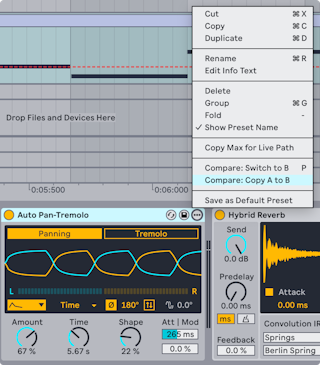
You can switch from the A device state to B using the Compare: Switch to B command or the P key. When the B device state is selected, a “(B)” appears next to the device’s name in the title bar.
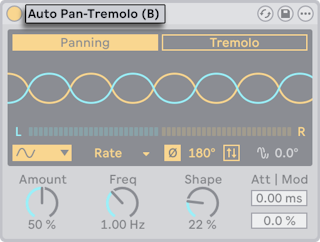
The Compare commands are available for both device states, so how you save parameter values to A and B is up to you. You could use one device state to keep the default values as a reference, or use both states to design completely different-sounding presets. Note that these commands are not available for Racks, Max for Live devices, or plug-ins.
Because A and B are unique device states, any parameter automation you create in one state is not shared with the other. This means if you automate a parameter in the A device state, that automation will be disabled when you switch to B and is not automatically re-enabled when you switch back to A.
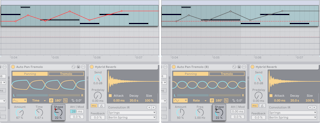
To reactivate any disabled parameter automation, use the Re-Enable Automation command in the parameter’s context menu when the device state you want to use is selected.
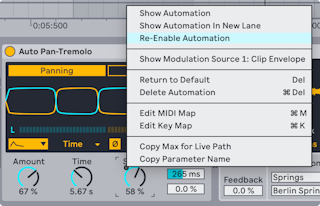
This command can be used from either device state. Keep in mind that since automation is specific to A and B, it will be disabled again each time you switch from one state to the other.
Only the parameter values from the selected device state are copied or duplicated. For example, if you copy a device while A is selected, the new device will use the parameter values from the original’s A device state for both A and B, even if the original’s B device state has other values.
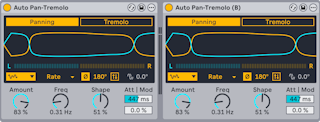
Similarly, if you save a preset to your User Library, the parameter values from the selected device state are used for both A and B.
Note that device states can be accessed via the Live API with Max for Live.
23.2.3 Live Device Presets
Live devices can store and retrieve their parameter settings as presets. Each device appears in the content pane of the browser as a folder that can be opened to reveal its presets.
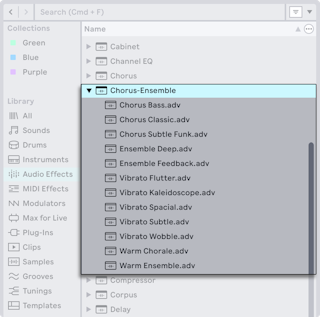
The folder represents the default preset for a device; this can be either the original factory settings or a custom default you have saved. The presets within the folder have custom settings. Presets are included as part of the Core Library and Packs. You can also create and save your own presets.
You can browse and load presets quickly with the computer keyboard:
- Scroll up and down using the up and down arrow keys.
- Close and open device folders using the left and right arrow keys.
- Press Enter to load a preset onto a selected track.
You can also double-click a preset in the browser to load it onto a selected track, or drag and drop a preset from the browser onto a track’s title bar or device chain.
Note that it is generally recommended to load presets via the browser; however, it is also possible to drag Live-specific device file types (such as .adg, .adv, and .amxd) directly into a Live Set from the Explorer (Win) / Finder (Mac).
If you want to replace a preset on a track with a different one, you can drag and drop a new preset from the browser and place it over the existing preset in the track’s device chain.
23.2.4 Hot-Swapping Presets
Using Hot-Swap mode is a quick way to replace a preset on a track. In this mode, the preset on the track is linked to the browser so that you can audition and load different presets. To start hot-swapping, press Q or click the Hot-Swap Presets button in the device’s title bar.

If you press Q to enter Hot-Swap mode, the currently selected preset on the track will be made available for swapping. If no preset is selected, the first audio effect (on audio tracks) or the instrument (on MIDI tracks) will be swapped.
Once Hot-Swap mode is enabled, the preset is selected in the browser and its device folder is expanded. You can replace the preset with another one from the same folder or navigate to a different folder to swap in a preset for another device. Only presets of the same device type can be hot-swapped. For example, it is not possible to swap an audio effect for a MIDI effect.
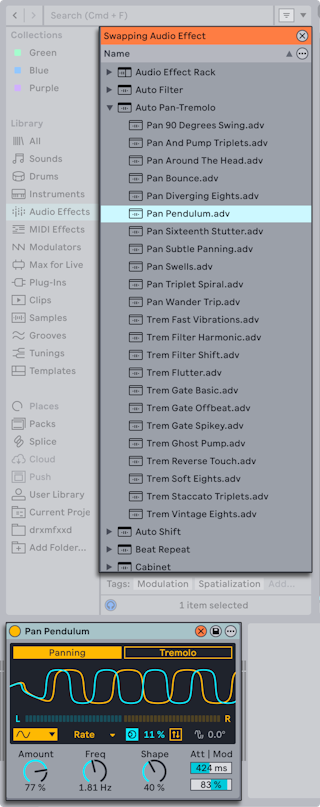
Use the up and down arrow keys to navigate through the presets. Press Enter to load the selected preset or double-click the preset you want to load. If you want to use a device’s default settings, select the device’s parent folder and load that instead of one of its presets.
Note that you can automatically load presets in Hot-Swap mode by adding the -EnableHotSwapOnSelection entry to the Options.txt file. With this option, the existing preset is replaced as soon as a new one is selected in the browser.
Once you are done replacing presets, you can exit Hot-Swap mode with any of the following actions:
- Press the Q key.
- Press the Esc key.
- Click the X button in the Hot-Swap bar at the top of the browser’s content pane.
- Click the X button in the device’s title bar.
- Navigate from the browser to a different view.
23.2.4.1 Hot-Swapping Samples
In addition to replacing entire presets, you can swap out loaded samples in Drum Rack pads, Drum Sampler, Impulse, Sampler, and Simpler.
To do so, use the Hot-Swap Sample button that appears in the following locations:
- Drum Rack pads — At the bottom right of each pad.
- Drum Sampler — At the bottom right of the Waveform Display.
- Impulse — At the bottom right of each sample slot.
- Sampler — At the top left of the Zone Editor when it is expanded.
- Simpler — At the bottom right of the Sample Display.
Note that the button is only visible when you hover over the relevant area (except in Sampler, where it is always visible). For example, you can hover over the Waveform Display to access the button in Drum Sampler.
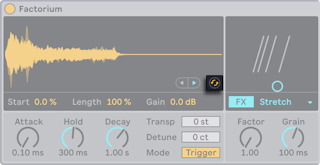
Clicking the button opens the folder where the sample is located in the browser. From there, you can replace the loaded sample with another one from the same folder or swap it with a sample from a different folder. Press Enter to load a selected sample or double-click the sample you want to load.
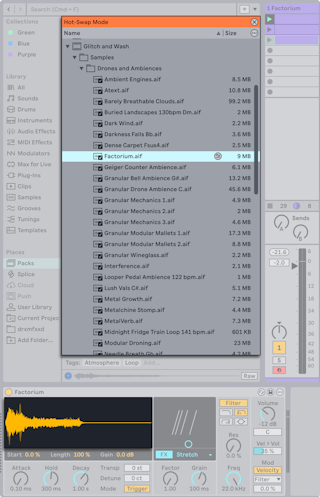
When you’re ready to stop swapping samples, you can exit Hot-Swap mode by:
- Clicking the Hot-Swap Sample button in the device.
- Clicking the X button in the Hot-Swap bar at the top of the browser’s content pane.
- Pressing the Esc key.
- Pressing the Q key.
- Navigating from the browser to a different view.
23.2.5 Saving Presets
You can save any presets that you have created or edited to the User Library in the browser. This makes it easy to organize and store presets for later use.
Click the Save Preset button in the device title bar to save the current device settings, along with any custom text you have added to the Info View, as a new preset.
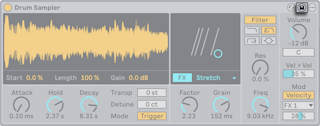
Once you click the button, the browser opens (if it is closed), and the preset is highlighted in its corresponding folder in the Presets folder of the User Library. You can rename the preset or keep its default name, then press Enter to confirm the save. Alternatively, press the Esc key to cancel the process.
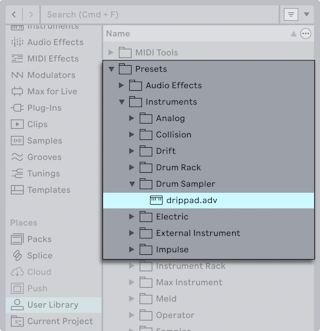
You can also save presets to any folder within the Places section of the browser by dragging the device via its title bar and dropping it into the desired folder.
Note that if the Collect Files on Export option in Live’s Library Settings is set to Ask, a dialog appears asking if you want to copy the files whenever you save or drag a preset that contains referenced samples to the browser.
For detailed information on what can be done with the browser, check out the Working with the Browser chapter. For more on how to store Project-specific presets, see the Projects and Presets section in the Managing Files and Sets chapter.
23.2.6 Defaults
You can create custom defaults to save and apply the settings you use the most for certain devices and workflows. Defaults allow you to:
- Load devices with pre-defined parameter values.
- Load VST and Audio Units plug-ins with specific parameter configurations.
- Create new MIDI and audio tracks with specified device and mixer settings.
- Customize the presets used for sample dropping, slicing, and converting audio to MIDI.
All defaults are stored in the Defaults folder in the User Library.
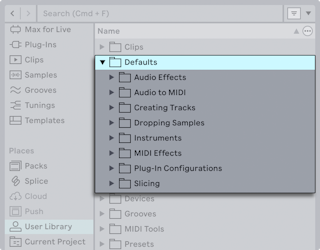
Once a default is saved, its settings are automatically applied whenever it is used in a Set.
To remove a saved default, use the Delete option from its context menu in the User Library, or select the item in the browser and press the Delete key. Once removed, the factory settings are once again applied for the corresponding item.
23.2.6.1 Default Presets
Each Live device loads with its factory settings when added to a track. You can save a device with a set of specified parameter values as a default preset so that the device loads with those settings instead.
To do so, set the desired parameter values for a device, then select the Save as Default Preset option from the device title bar’s Options menu or context menu. This option is available for all of Live’s instruments, MIDI effects, audio effects, and Rack types.
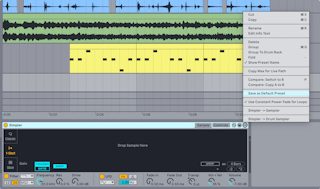
After the option is selected, the device is saved to the relevant folder within the Defaults folder: Audio Effects, Instruments, or MIDI Effects.
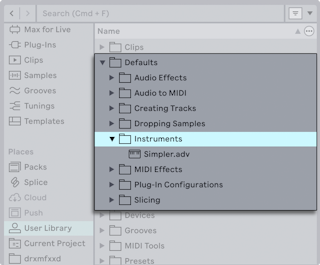
You can also drag the device from a track into one of the device type folders to save it as a default preset. Make sure the preset has the original device name (e.g., Simpler) and not a unique name; otherwise, the preset will not be recognized as a default.
Once the preset is saved, its settings are loaded any time you add the device to a track. If you save a default for an instrument that contains a sample, the sample is also loaded.
If you create a new default for a device that already has one, a dialog appears asking if you want to overwrite the existing preset.
23.2.6.2 Default Plug-in Configurations
You can save the parameter configuration for a VST or Audio Units plug-in as a default. Add the parameters you want to include in Configure Mode, then select the Save as Default Configuration option in the device title bar’s Options menu or context menu.
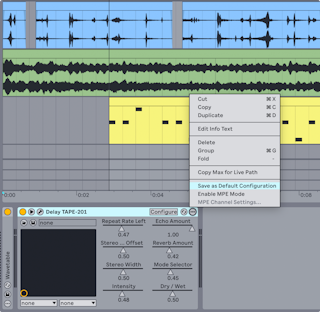
The default is saved to its respective folder, either Audio Units or VSTs, in the Plug-In Configurations folder, which is automatically created the first time you save a default configuration.
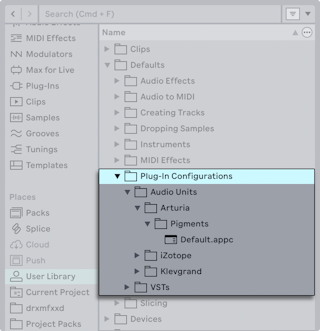
If you have both the VST and Audio Units version of the same plug-in installed, you can create separate default configurations for each type.
Note that plug-in defaults do not retain any parameter values: only the parameters that have been added to the device panel in Live are saved. If you want to retain the parameter settings along with the configuration, add the plug-in to a Rack and then save that Rack as a default preset.
23.2.6.3 Track Defaults
With track defaults, you can load devices and certain mixer settings (such as I/O routing, volume, pan, and sends) any time you create a new audio or MIDI track.
Set up a track with the devices and mixer settings you want to store, then select the Save as Default Audio Track or Save as Default MIDI Track option from the track title bar’s context menu.
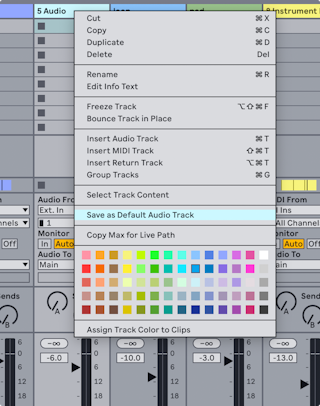
This saves the default to its respective folder, either Audio Track or MIDI Track, in the Creating Tracks folder in the User Library. You can also drag an audio or MIDI track into its corresponding folder to save it as a default. Note that the saved track must be named either Default Audio Track or Default MIDI Track in order for it to be recognized as a default.
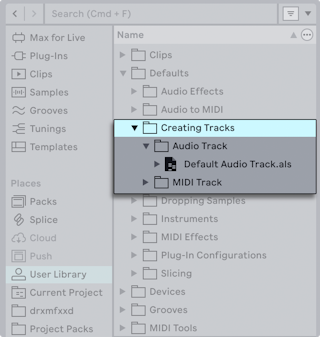
The saved default’s devices and mixer settings are then populated any time you create its corresponding track type.
23.2.6.4 Sample Dropping Defaults
You can specify which instrument is added when dropping a sample either into the Device View for an empty MIDI track or onto a Drum Rack pad.
To do so, add an empty Sampler or Simpler device to a MIDI track and adjust its settings as needed. Then, drag the device into one of the two Dropping Samples folders: On Device View or On Drum Rack.
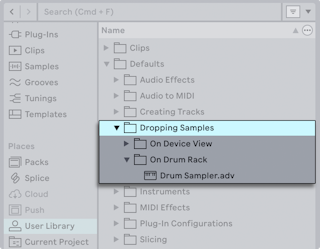
You can also save a default for Drum Rack pads via the Save as Default Pad option from a pad’s context menu, which adds the preset to the On Drum Rack folder as well.
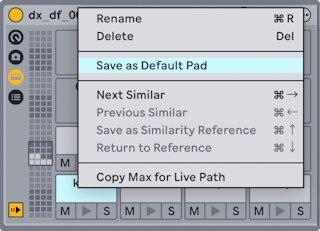
Note that while it is possible to add multiple presets to the same sample dropping folder, only one default can be used at a time. When dropping samples, the preset that was last added to the folder is used.
23.2.6.5 Slicing Defaults
In addition to the built-in slicing presets, you can set up a custom Drum Rack for slicing audio to MIDI.
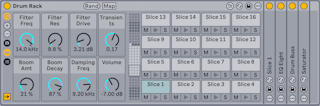
Add an empty Drum Rack to a MIDI track, then drag an empty Sampler or Simpler device onto a pad to create a single chain. You can add any MIDI or audio effects to the chain, as well as assign device parameters to the Drum Rack’s Macro Controls. Once you have all the settings configured, drag the Drum Rack into the Slicing folder.
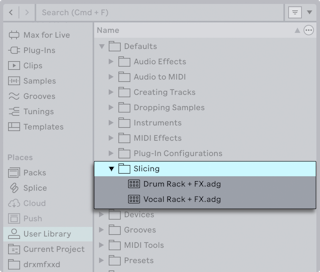
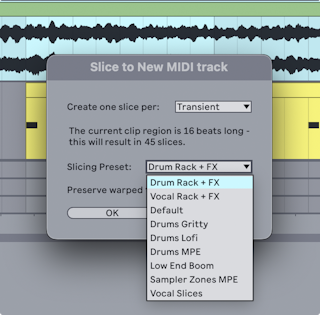
Saved slicing presets can then be selected from the Slicing Preset chooser that appears in the Slice to New MIDI Track dialog.
23.2.6.6 Converting Audio to MIDI Defaults
Similar to slicing presets, you can set up custom Racks for converting Harmony, Melody, or Drums to MIDI.

It is recommended to use an Instrument Rack for the Harmony and Melody conversions, that way you can add MIDI and audio effects to the device chain. However, it is also possible to use a single instrument on its own if desired. The Drums to MIDI conversion requires a Drum Rack with Sampler or Simpler devices on its pads.
Add the devices you want to use to the Instrument Rack (if using one), or add the drum hits you want included in the Drum Rack. Adjust the device parameters and map them to the Macro Controls as needed. Drag the configured device or Rack into one of the three Audio to MIDI folders: Drums to MIDI, Harmony to MIDI, or Melody to MIDI to save it as a default.
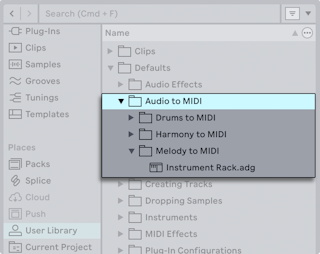
You can also drag an existing device or Rack preset into the conversion folders instead of creating one from scratch. Make sure to only add a Drum Rack to the Drums to MIDI folder, and not a Drum Rack nested in an Instrument Rack; otherwise, the preset will not be recognized as a default.
After the default is saved, it will be used any time you run its corresponding conversion command.
Note that while it is possible to add multiple presets to the same conversion folder, only one default can be used at a time. When running the conversion command, the preset that was last added to the folder is used.
23.2.6.7 Project-Specific Defaults
In addition to creating program-wide defaults, you can also save Project-specific ones. This can be useful if you need specialized device or workflow settings for a particular Set but don’t want to overwrite the more general defaults you use on a regular basis.
To store Project-specific defaults, add a separate Defaults folder to the Current Project folder, along with any of its related folders that you want to use. You can create these folders directly in the Project folder in Explorer (Win) or Finder (Mac), or use the New Folder context menu option for the Current Project in the browser. Once created, you can drag custom devices or tracks into their corresponding folders.
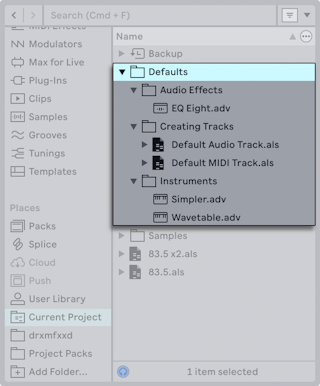
It is not possible to drag a plug-in into the Current Project folder, so there is a workaround for saving Project-specific plug-in configurations. Make sure to first create the Plug-In Configurations, Audio Units, and VSTs folders in the Defaults folder for the Current Project.
You can then save a configuration as normal and drag the plug-in folder with the Default.appc file from the User Library into the Audio Units or VSTs folder in the Current Project. Since this removes the configuration from the main Defaults folder, you can save the same default again if you also want a copy in the User Library, or create a new one with different settings.
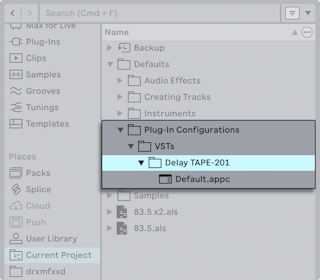
Once the Project-specific defaults are set up, they will be loaded instead of the ones from the Defaults folder in the User Library any time you use their corresponding items in a Set from the Project.
Note that the context menu options for saving defaults are specifically for storing presets in the Defaults folder in the User Library, and therefore cannot be used to save Project-specific defaults.
23.3 Device Delay Compensation
Live automatically compensates for delays caused by built-in devices and plug-ins, including those on the return tracks. These delays can arise from the time taken by devices to process an input signal and output a result. The compensation algorithm keeps Live’s tracks in sync while minimizing delay between the player’s actions and the audible result.
Device delay compensation is on by default and does not normally have to be adjusted in any way. To manually turn latency compensation on (or off), use the Delay Compensation option in the Options menu.
When Delay Compensation is on, the Reduced Latency When Monitoring option is available in the Options menu. This option toggles latency compensation on and off for tracks which have input monitoring on. When enabled, input-monitored tracks will have the lowest possible latency, but may be out of sync with some other tracks in your Set, such as Return tracks, which are still delay compensated. When disabled, all tracks will be in sync, but input-monitored tracks may have higher latency.
Note that tempo-synced effects and other devices that get timing information from Live’s internal clock may sound out of sync if they are placed in a device chain after devices which cause delay.
Unusually high individual track delays or reported latencies from plug-ins may cause noticeable sluggishness in the software. If you are having latency-related difficulties while recording and playing back instruments, you may want to try turning off device delay compensation; however, this is not normally recommended. You may also find that adjusting the individual track delays is useful in these cases, but please note that the Track Delay controls are unavailable when device delay compensation is deactivated.
Note that device delay compensation can, depending on the number of tracks and devices in use, increase the CPU load.