24. Using Plug-Ins
The collection of devices that you can use in Live can be extended with plug-ins. Live supports Steinberg Media’s VST plug-in format, as well as the Audio Units (AU) plug-in format (macOS only), specifically:
- VST2
- VST3
- Audio Units 2
- Audio Units 3 (Live 11.2 and later)
Working with VST and Audio Units plug-ins is very much like working with Live devices. VST and AU instruments can only be placed in Live MIDI tracks and, like Live instruments, they will receive MIDI and output audio signals. Plug-in audio effects can only be placed in audio tracks or following instruments. Please see the previous section, Using the Live Devices, for details.
To skip plug-in scanning when Live is launched, hold the Alt (Win) / Option (Mac) modifier when opening the program until the splash screen closes. This can be helpful when troubleshooting crashes to see if any plug-ins are causing the problem.
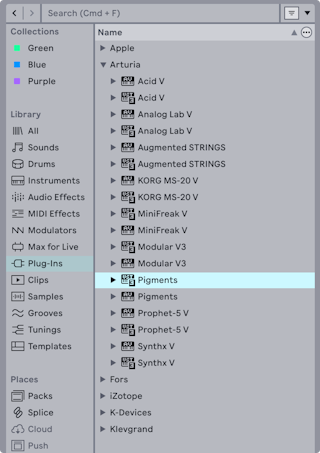
Audio Units and VST plug-ins are browsed and imported using the browser’s Plug-Ins label. Plug-in instruments can be differentiated from plug-in effects in the browser, as they appear with a keyboard icon.
Note that plug-in presets are only available in the browser for Audio Units plug-ins. In some instances, factory presets for Audio Units will only appear in the browser once the device has been placed in a track and its Hot-Swap button activated.
Note: The first time you start Live, no plug-ins will appear in the Plug-Ins label as you must first “activate“ your plug-in sources. Activating your plug-in sources tells Live which plug-ins you want to use and where they are located on your computer. Information on activating (and deactivating) plug-in sources can be found later in this chapter, in the sections on the VST Plug-In folder and Audio Units Plug-Ins.
Note for “Intel® Mac“ users: Intel® Mac computers cannot natively run VST or AU plug-ins that have been written for the PowerPC platform. Only plug-ins of type Universal or Intel® can be used in Live.
If you install/uninstall a plug-in while the program is running, Live will not detect your changes or implement them in the browser until the next time you start the program. Use the Rescan button in the Plug-Ins Settings to rescan your plug-ins while Live is running, so that newly installed devices become immediately available in the browser.
You can also rescan if you believe that your plug-in database has somehow become corrupted. Holding down the Alt (Win) / Option (Mac) modifier while pressing Rescan will delete your plug-in database altogether and run a clean scan of your plug-ins.
24.1 Plug-Ins in the Device View
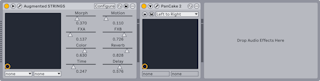
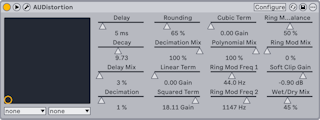
Once a plug-in is dragged from the browser into a track, it will show up in the Device View. For plug-ins with up to 64 modifiable parameters, a Live panel will represent all of the parameters as horizontal sliders. Plug-ins that contain more than 64 parameters will open with an empty panel, which you can then configure to show the parameters you want to access. The plug-in’s original interface can be opened in a separate window.
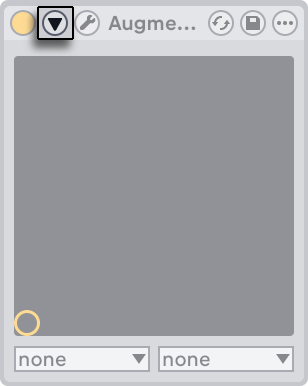
You can view or hide the plug-in’s parameters by toggling the  button in the plug-in’s title bar.
The X-Y control field can be used to control two plug-in parameters at once and is therefore especially well-suited for live control. To assign any two plug-in parameters to the Live panel X-Y field, use the drop-down menus directly beneath it.
24.1.1 Showing Plug-In Panels in Separate Windows
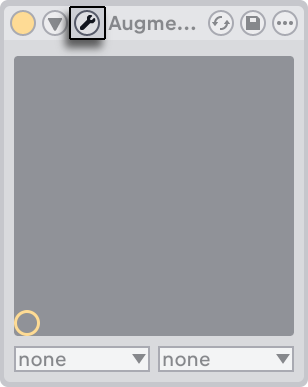
The Show/Hide Plug-In Window button opens a floating window that shows the original VST or Audio Units plug-in panel. Changing parameters on the floating window has the same effect as changing them in the Live panel, and vice versa.
There are a few important Plug-Ins Settings for working with plug-in windows:
- If activated, the Auto-Open Plug-In Windows option assures that plug-in windows open automatically when plug-ins are loaded into tracks from the browser.
- If the Multiple Plug-In Windows option in the Plug-In Settings is activated, you can open any number of plug-in windows at once. Even with this option off, you can hold down the Ctrl (Win) / Cmd (Mac) modifier when opening a new plug-in window to keep the previous window(s) from closing.
- Using the Auto-Hide Plug-In Windows option, you can choose to have Live display only those plug-in windows belonging to the track that is currently selected.
You can use the View menu’s Show/Hide Plug-In Windows command or the CtrlAltP (Win) / CmdOptionP (Mac) shortcut to hide and show open plug-in windows. Note that the shortcut only works if the plug-in windows have already been opened manually first or if the Auto-Open Plug-In Windows option is enabled in Live’s Settings. An open plug-in window shows the name of the track to which the plug-in belongs in the title bar of the plug-in window.
24.1.2 Plug-In Configure Mode
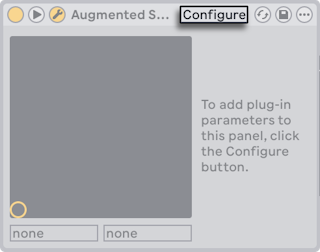
Configure Mode allows you to customize Live’s panel to show only the plug-in parameters that you need to access. To do this:
- Enter Configure Mode by pressing the “Configure“ button in the device’s header.
- Click on a parameter in the plug-in window to add it to Live’s panel. For some plug-ins, it may be necessary to actually change the parameter’s value. Additionally, certain plug-ins do not “publish“ all of their parameters to Live. These parameters cannot be added to Live’s panel.
While in Configure Mode, parameters in Live’s panel can be reordered or moved by dragging and dropping them to new locations. Parameters can be deleted by pressing the Delete key. If you try to delete a parameter that has existing automation data, clip envelopes, or MIDI, key or Macro mappings, Live will warn you before proceeding.
The parameters that you assign are unique for each instance of a given plug-in in your Set, and are saved with the Set. If you would like to save a setup using a particular collection of parameters, you can create a Rack containing the configured plug-in. Racks can then be saved to your User Library and loaded into other Sets. You can also save a particular parameter configuration as a default.
Certain plug-ins do not have their own windows, and instead only show their parameters in Live’s panel. For these plug-ins, it is not possible to delete parameters when in Configure Mode (although they can still be moved and reordered).
There are several ways to add plug-in parameters to Live’s panel without entering Configure Mode:
- Adjusting a parameter in the plug-in’s floating window creates temporary entries for that parameter in the clip envelope and automation choosers, as well as the choosers in the panel’s X-Y field. These entries are removed when you adjust another parameter. To make the entry permanent (thus adding it to Live’s panel), either edit the parameter’s automation or clip envelope, select another parameter in the automation or clip envelope choosers, or select the temporary parameter in one of the X-Y field’s choosers.
- When a parameter is changed on a plug-in’s floating window during recording, automation data is recorded automatically. When recording is stopped, the automated parameters are automatically added to Live’s panels for any plug-ins that were adjusted.
- When in MIDI, key or Macro mapping mode, adjusting any parameter in the plug-in’s window will create it in Live’s panel. The new panel entry will be automatically selected, allowing you to map it immediately.
Once a plug-in is placed in a track and you have (optionally) configured its parameters in Live’s panel, you can use it just like a Live device:
- You can map MIDI controller messages to all of the parameters in Live’s panel.
- You can drag or copy the device to different locations in the device chain or to other tracks, according to the rules of audio effects and instruments.
- You can automate or modulate its continuous parameters with clip envelopes.
- You can use the multiple I/O features of some plug-ins by assigning them as sources or targets in the routing setup of tracks. See the Routing and I/O chapter for details.
- You can create custom info text for the plug-in.
24.2 Sidechain Parameters
Normally, the signal being processed and the input source that triggers the plug-in device are the same signal. But by using sidechaining, it is possible to apply processing to a signal based on the level of another signal. In plug-in devices that support sidechaining, you can access the sidechain parameters on the left side of the device.
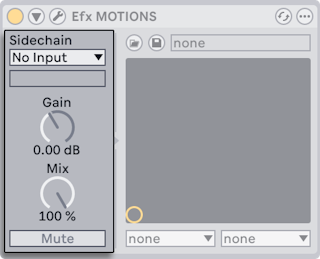
The choosers allow you to select any of Live’s internal routing points. This causes the selected source to act as the device’s trigger, instead of the signal that is actually being processed.
The Gain knob adjusts the level of the external sidechain’s input, while the Mix knob allows you to use a combination of sidechain and original signal as the trigger. With Mix at 100%, the device is triggered entirely by the sidechain source. At 0%, the sidechain is effectively bypassed. Note that increasing the gain does not increase the volume of the source signal in the mix. The sidechain audio is only a trigger for the device and is never actually heard.
The Mute button allows you to listen to only the plug-in device’s output, bypassing the sidechain source’s input.
24.3 VST Plug-Ins
24.3.1 The VST Plug-In Folder
When you start Live for the first time, you will need to activate your VST plug-in sources before working with VST plug-ins. Depending on your computer platform, you may also have to tell Live about the location of the VST plug-in folder containing the devices you want to use. In order to set up your VST sources, press the Activate button in the browser’s Plug-Ins panel, or open the Plug-Ins Settings by pressing Ctrl, (Win) / Cmd, (Mac). There you will find the Plug-In Sources section.

For Windows, proceed as follows:
- Use the VST Plug-In Custom Folder entry to tell Live about the location of your VST plug-ins: Click the Browse button to open a folder-search dialog for locating and selecting the appropriate folder.
- Once you have selected a VST Custom Folder and Live has scanned it, the path will be displayed. Note that on Windows, Live may have found a path in the registry without the need for browsing.
- Make sure that the Use VST Plug-In Custom Folder option is set to “On,“ so that your selected folder is an active source for VST plug-ins in Live. Note that you can choose not to use your VST plug-ins in Live by turning off the Use VST Plug-In Custom Folder option.
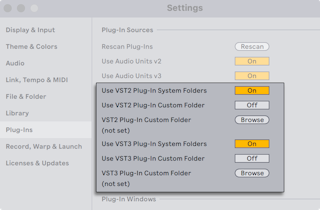
Set up your VST plug-ins under macOS by doing the following:
- Your VST plug-ins will normally be installed in the following folder in your home and local directories: /Library/Audio/Plug-Ins/VST. You can turn Live’s use of these plug-ins on or off with the Use VST plug-ins in System Folders option.
- You may have an alternative folder in which you store your VST plug-ins (perhaps those that you use only with Live). You can use VST plug-ins in this folder in addition to, or instead of, those in the System folders. To tell Live about the location of this folder, click the Browse button next to the VST Plug-In Custom Folder entry to open a folder-search dialog for locating and selecting the appropriate folder.
- Note that you can turn off your VST plug-ins in this folder using the Use VST Plug-In Custom folder option.
Once you have configured your Plug-Ins Settings, the browser will display all plug-ins it finds in the selected VST plug-in folder(s) as well as any sub-folders.
It is also possible to use VST plug-ins stored in different folders on your computer. To do this, create a macOS or Windows alias of the folder where additional VST plug-ins are stored, and then place the alias in the VST Plug-In Custom folder (or in the VST Plug-In System folder on macOS) selected in Live’s Plug-Ins Settings. The alias can point to a different partition or hard drive on your computer. Live will scan the set VST plug-in folder as well as any alias folders contained therein.
Some VST plug-ins contain errors or are incompatible with Live. During the scanning process, these may cause the program to crash. When you re-launch Live, a dialog will appear to inform you about which plug-in caused the problem. Depending on what Live detects about the plug-in, you may be given the choice between performing another scan or making the problematic plug-in unavailable. If you choose to rescan and they crash the program a second time, Live will automatically make them unavailable, meaning that they will not appear in the browser and will not be rescanned again until they are reinstalled.
24.3.2 VST Presets and Banks
Every VST plug-in instance “owns“ a bank of presets. A preset is meant to contain one complete set of values for the plug-in’s controls.
To select a preset from the plug-in’s bank, use the chooser below the title bar. The number of presets per bank is fixed. You are always working “in“ the currently selected preset, that is, all changes to the plug-in’s controls become part of the selected preset.
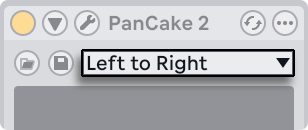
Note that VST presets are different from Live device presets: Whereas the presets for a Live device are shared amongst all instances and Live Sets, the VST presets “belong“ to this specific instance of the VST plug-in.
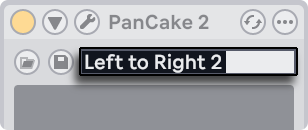
To rename the current preset, select the VST’s Device Title Bar and execute the Edit menu’s Rename Plug-In Preset command. Then type in a new preset name and confirm by pressing Enter.
VST presets and banks can be imported from files. Clicking a VST’s Load Preset or Bank button brings up a standard file-open dialog for locating the desired file.
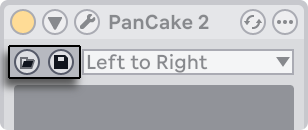
Windows only: Please select from the File Type filter in the Windows dialog whether you want to locate VST Presets (VST Program Files) or VST Banks (VST Bank Files).
To save the currently selected preset as a file, click the VST Save Preset or Bank button to bring up a standard file-save dialog; select “VST Preset“ from the Format menu (Mac)/from the File Type menu (Windows); select a folder and name. For saving the entire bank as a file, proceed likewise but choose “VST Bank“ as a file type/format.
24.4 Audio Units Plug-Ins
Audio Units plug-ins are only available in macOS. In most respects, they operate just like VST plug-ins.
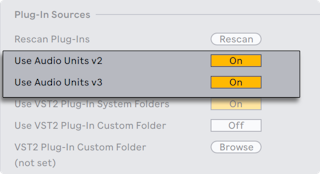
The first time you open Live, Audio Units plug-ins will not appear in the browser. In order to activate your Audio Units as a plug-in source, please press the Activate button in the browser’s Plug-Ins label, or go to the Plug-Ins Settings by pressing Ctrl, (Win) / Cmd, (Mac). There you will find the Plug-In Sources section. Turning on the Use Audio Units option activates Audio Units plug-ins so that they appear in Live’s browser.
Note that you can always turn this option off later if you decide not to use Audio Units.
Audio Units plug-ins sometimes have a feature that allows choosing between different modes for the device. You might be able to choose, for example, between different levels of quality in the rendering of a reverb. Choosers for these device modes can only be accessed through the original plug-in panel, which is opened using the Show/Hide Plug-In Window button.
Audio Units have presets that function just like those for the Live effects. However, some AU presets cannot be dragged to different locations in the browser, as they are read-only.
Audio Units presets have an .au preset extension and are stored in the following directory according to their manufacturer’s name:
(Home)/Library/Audio/Presets/(Manufacturer Name)/(Plug-in Name)