26. Automation
When working with a Set, you may want to adjust device or mixer controls to change the character of the sound over time. While you can always tweak parameters manually, in some situations it might be more effective for the tweaks to happen automatically, especially if you want to ensure that parameter changes occur at specific points in time on subsequent playbacks. Automation allows you to save a record of the adjustments made to specific parameters over time.
Any control whose value automatically changes in the course of the playback is automated. Practically all mixer and device controls in Live can be automated, including the song tempo. A colored LED that appears next to a parameter indicates that the parameter has been automated. The LED is typically red, though the exact color depends on the theme you are using. Note that blue LEDs always indicate modulated rather than automated parameters.
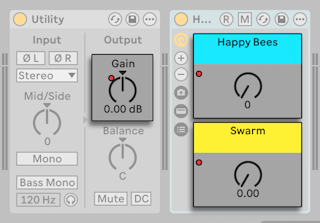
Automation data is represented by breakpoint envelopes referred to as automation envelopes. In Session View, automation envelopes are available as one of the clip envelope types, while in Arrangement View you can view them in automation lanes.
Automation can be recorded in Session clips or in Arrangement tracks. You can also create new automation envelopes without recording, or edit existing ones.
26.1 Recording Automation in Session View
You can record automation in the Session View in two ways: by recording it in Session clips or by recording the Session into the Arrangement. If you choose the latter, any changes to parameters made in Session View will be recorded as track-based automation in the Arrangement’s automation lanes rather than clip-based automation in the Session clips. Recording automation into the Arrangement View also allows you to automate the tempo directly from the Session View.
To record automation in Session View’s clips, first enable the Automation Arm button in the Control Bar.

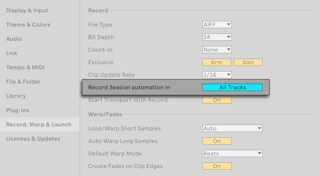
Then, arm the tracks in whose clips you want to record automation. It is also possible to record automation into all playing Session clips, regardless of whether or not they are in armed tracks. This allows you to, for example, overdub Session automation into an existing MIDI clip without also recording notes into the clip. To record automation in all tracks, set the Record Session automation in option in Live’s Record, Warp & Launch Settings to All Tracks.
Once the tracks are armed, click the Session Record button to start recording. Any adjustments you now make to the mixer parameters or device parameters will be saved as automation.

When you are finished, you can either press the Session Record button to stop recording but continue playback, or you can press the Stop button, which stops the transport as well as recording.
You can view and edit the recorded automation in the Clip View’s Envelope Editor.
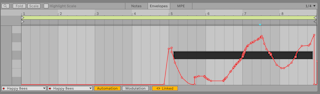
Note that if you copy Session clips that contain automation into the Arrangement, the automation data will be copied as well and added as track-based automation. During Session-to-Arrangement recording, existing automation in Session clips is also recorded to the Arrangement, alongside other parameter changes that occur at the time of recording.
26.2 Recording Automation in Arrangement View
In Arrangement View, automation is recorded in all tracks, as long as the Automation Arm button is enabled.
To record automation, click the Arrangement Record button, which by default should start transport and start recording. Any adjustments you now make to the tempo, the mixer parameters, or the device parameters will be saved as automation.

When you are finished, you can either press the Arrangement Record button to stop recording but continue playback, or you can press the Stop button next to the Arrangement Record button, which stops the transport as well as recording.
You can view and edit the recorded automation in the tracks’ automation lanes.
26.3 Overwriting Automation
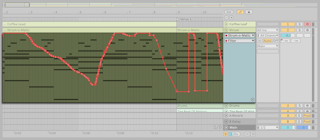
If there is existing automation in a clip or a track’s automation lane, it will be overwritten if you make new adjustments to the same parameter while recording. For example, if you recorded automation for a parameter in a looping clip on first playback, any additional changes you make to the parameter when the loop restarts will be recorded and replace the original changes.
In the Session View, how the automation gets overwritten depends on how you adjust a parameter while recording. When using the mouse, the parameter returns to the previously recorded value as soon as you release the mouse. This is referred to in some applications as “touch” behavior. When using knobs or faders on MIDI controllers, the parameter holds the last set value until the end of the clip or its loop, which is known as “latch” behavior in some applications. Note that when recording automation in a Session clip for the first time, Live uses the “latch” behavior, regardless of the adjustment method.
26.4 Overriding Automation
You may want to try out new parameter settings without overwriting existing automation data. This can be done by temporarily deactivating a parameter’s automation, which is referred to as overriding automation.
To override a parameter’s automation, make sure you are not recording and then make changes to the parameter’s value. Once you adjust the parameter, the automation LED changes color to gray to indicate the parameter’s automation is inactive, overridden by the current manual setting.
When overriding an automated parameter, the Re-Enable Automation button in the Control Bar becomes active.

You can click on the button to reactivate all overridden automation. When active, the button also serves as a quick visual indicator that one or more automated parameters have been overridden.
While the Re-Enable Automation Button restores all overridden parameters to their automated state, you can also re-enable automation for only one parameter at a time. To do so, select the Re-Enable Automation option from the parameter’s context menu. In Session View, you can also re-enable overridden automation by relaunching a clip that contains automation.
26.5 Viewing Automation
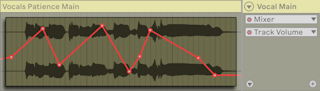
Automation envelopes contain a series of breakpoints that represent a given parameter’s values across the timeline. The envelopes are displayed on top of the clip’s or track’s content, which can be helpful when lining up breakpoints with the audio waveform or MIDI notes. An automation envelope’s vertical axis represents the parameter value and the horizontal axis represents time.
26.5.1 Viewing Automation in Session View
A Session clip’s automation envelope is accessible via the Envelope Editor, while in the Arrangement automation envelopes are shown in automation lanes, separate for each track.
To view a clip’s automation envelope in the Session View, open the Clip View’s Envelope Editor, then enable the Automation toggle at the bottom. Then, use the Device and Control choosers to the left of the toggle to select the device and parameter whose automation you would like to view.
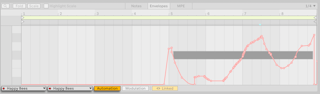
The Device chooser contains entries for the track’s devices and the mixer, as well as the MIDI Ctrl entry (which allows you to view and edit a MIDI controller clip envelope). The Control chooser contains a list of all controls available for the option selected in the Device chooser. A colored LED is shown next to automated controls as well as devices that contain them. Note that when you select a control that has not been automated, a dashed line will be displayed in the Envelope Editor, reflecting the control’s current value.
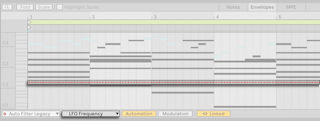
You can reduce the length of the device and controls lists by selecting the Show Adjusted Envelopes Only option at the bottom of either chooser. Note that when this option is selected the Device and Control choosers are combined into one Automated Control chooser, which lists the device name alongside its automated control.
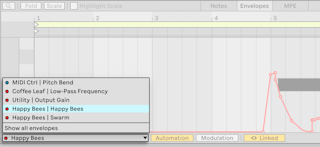
Select the Show All Envelopes option from the chooser to view the complete list of entries again in the Device and Control choosers.
When the Envelope Editor is open and the Clip View and Device View are stacked, you can click on a device control to display the control’s envelope in the editor, even if the control is not automated. This also applies to mixer controls for the track in which the clip is located. Note that if the Show Adjusted Envelopes Only option has been selected in the Device or Control chooser, clicking on non-automated controls will not open their envelopes in the Envelope Editor. However, if a non-automated envelope is already displayed when you enable the Show Adjusted Envelopes Only option, the envelope will continue to be displayed in the Envelope Editor.
26.5.2 Viewing Automation in Arrangement View
To display automation envelopes in the Arrangement’s automation lanes, enable the Automation Mode button above the track headers, or press the A key. This opens the main automation lane for each track below the track header.
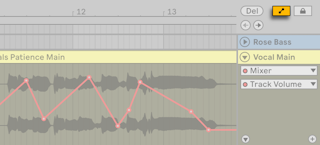
The Device and Automation Control choosers in the main lane allow you to select the device and parameter whose automation you would like to view.
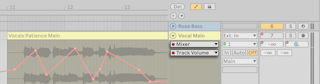
Use the Device chooser to select one of the track’s devices or the mixer. Selecting None hides the automation envelope. The Automation Control chooser contains a list of all controls available for the option selected in the Device chooser. When None is selected in the Device chooser, the Automation Control chooser is empty.
A colored LED is shown in the choosers next to automated controls as well as devices that contain them. Note that when you select a control that has not been automated, a dashed line will be displayed in the automation lane, reflecting the control’s current value.
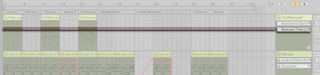
You can reduce the length of the device and controls lists by selecting the Show Automated Parameters Only option at the bottom of either chooser. Note that when this option is selected, the Device and Automation Control choosers are combined into one chooser, which lists the device name alongside its automated control.
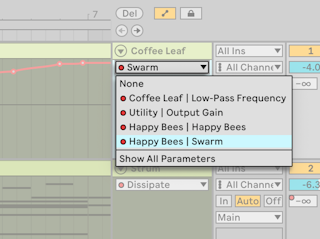
Select the Show All Parameters option from the chooser to view the complete list of entries again in the Device and Automation Control choosers.
When the Automation Mode button is enabled, you can click on a track’s mixer controls or the controls in the track’s devices to display their envelopes in the automation lane, even if the controls are not automated. You can also choose either the Show Automation or Show Automation in New Lane option from a parameter’s context menu, which will automatically enable Automation Mode and focus the corresponding automation lane. Note that if the Show Automated Parameters Only option has been selected in the Device or Automation Control chooser, clicking on non-automated controls will not open their envelopes in the automation lane, the Show Automation option will be disabled, and the Show Automation in New Lane option will be unavailable. However, if a non-automated envelope is already displayed when you enable the Show Automated Parameters Only option, the envelope will continue to be displayed in the automation lane.
By default, only the main automation lane is shown, but you can add more lanes to view different parameters’ envelopes at the same time. To do so, press the Add Automation Lane button to move the envelope from the main automation lane to a separate lane. This automatically sets the Device chooser to None in the main lane; you can then select another automation parameter from the choosers to view the two automation envelopes simultaneously. Note that the Add Automation Lane is not displayed when None is selected; the button reappears once you select another device and parameter from the Device and Automation Control choosers. You can then move this envelope to its own lane.
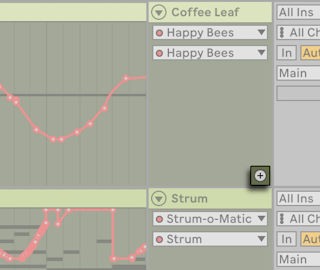
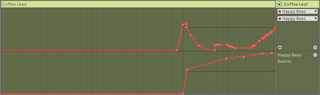
Whenever more than one automation lane is displayed, a toggle appears in the main lane that allows you to hide and show the additional lanes. Note that if the Device chooser is set to None in the main automation lane, the topmost additional lane will be moved to the main lane when hiding additional lanes with the toggle.
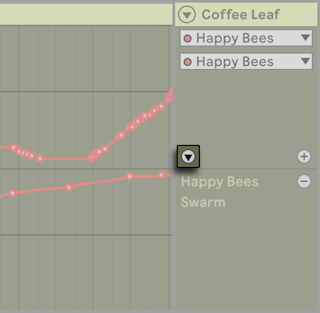
You can rearrange the additional lanes by dragging and dropping.
You can use the up and down arrow keys to navigate all lanes. While an additional automation lane is focused, you can use the left arrow key to navigate back to the main lane. You can also use the left and right arrow keys while the main automation lane is focused to hide or show additional lanes.
When a parameter’s automation envelope is already displayed in an additional lane, selecting that parameter in the Automation Control chooser will move focus to its automation lane. It is possible to add a duplicate lane for the envelope displayed in the main lane. To do so, hold the Ctrl (Win) / Option (Mac) key and click the Add Automation Lane button. Note that you can only add two such duplicate lanes.
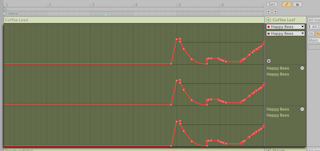
To add automation lanes for all of the track’s automated parameters, hold Alt (Win) / Cmd (Mac) and click the Add Automation Lane button.
To remove an automation lane you added, click the Remove Automation Lane button in the lane. You can remove multiple lanes at a time by selecting their headers with Ctrl-click (Win) / Cmd-click (to select multiple items individually) or with Shift-click (to select all of the items between the first and last selected item), and then clicking the Remove Automation Lane button in any of the lanes. To remove a lane as well as all of the lanes below it, hold Alt (Win) / Cmd (Mac) and click the Remove Automation Lane button in the lane.
26.5.2.1 Context Menu Options for Automation Lanes
You can access the following options for managing automation lanes via the context menu in automation lane headers:
- Add Automation Lane moves the envelope from the main lane to a separate late. This option is available in the main lane’s context menu.
- Add Lane for Each Automated Envelope adds automation lanes for all of the track’s automated parameters.
- Remove Automation Lane removes all selected automation lanes. This option is available in the additional lanes’ context menus.
The context menu also contains commands to quickly clear all automation envelopes for the track or any of its devices.
26.6 Creating Automation Envelopes
While you can record automation, you can also use the Envelope Editor or automation lanes to create new automation envelopes by adding individual breakpoints with the mouse or keyboard, by drawing the envelopes with Draw Mode enabled, or by inserting automation shapes.
26.6.1 Adding Automation Envelope Breakpoints
You can draw a new automation envelope for a parameter by inserting breakpoints with the mouse or keyboard in the Envelope Editor or an automation lane. To insert a breakpoint with the mouse, make sure the parameter you want to automate is selected in the chooser, then click anywhere on the dashed line. Inserting a breakpoint creates an automation envelope, which is reflected by the dashed line changing into a solid line. You can also click and drag on the line to set a desired value for the breakpoint before inserting. Hold Shift as you drag to make finer adjustments to the parameter value. Double-clicking anywhere outside of the line creates a new breakpoint at that location.
Note that breakpoints automatically snap to grid lines. To bypass grid snapping, hold down Alt (Win) / Cmd (Mac) while inserting a breakpoint.
The current parameter value is displayed when you hover over the line or when you click and drag. When inserting breakpoints with a double-click, the parameter value for a breakpoint is displayed at the moment the breakpoint is inserted. You can hover over the breakpoints you inserted to view their value. You can also create new breakpoints at an exact value by hovering over the line to view the value, then right-clicking and choosing the Add Value option.
When working with parameters which can only be set to discrete states rather than a continuous range, such as toggles or radio buttons, the automation envelope does not transition diagonally between breakpoints and has a stepped shape instead.
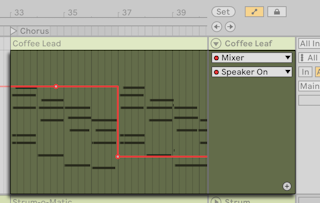
To read about inserting breakpoints with the keyboard, check out the Editing Automation and Modulation Envelopes section of the Accessibility and Keyboard Navigation chapter.
26.6.2 Drawing Automation Envelopes with Draw Mode
With Draw Mode enabled, you can click and drag to freely draw the entire envelope shape without stopping to add individual breakpoints. To toggle Draw Mode, select the Draw Mode option from the Options menu, click on the Control Bar’s Draw Mode toggle, or press B. Holding B while Draw Mode is off will temporarily toggle the mode on.

By default, drawing the envelope in Draw Mode creates steps as wide as the visible grid. You can modify the grid width using shortcuts, via the entries in the Options menu, or via the context menu in the Envelope Editor or automation lane.
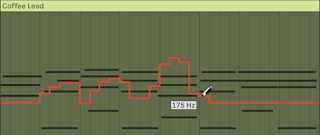
You can also draw the envelope without snapping to the grid, which results in smoother transitions. To do so, hide the grid by disabling the Snap to Grid option in the Options or context menu, or with the Ctrl4 (Win) / Cmd4 (Mac) shortcut. To temporarily bypass grid snapping, hold down Alt (Win) / Cmd (Mac) while drawing.
26.6.3 Inserting Automation Shapes
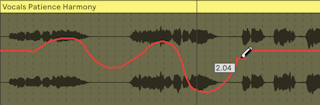
Instead of drawing automation envelopes from scratch, you can also create envelopes by inserting automation shapes. This can help you quickly create complex rhythmic automation patterns, as well as more subtle, slow-paced movements like swells or builds. You can insert shapes at the insert marker or at a time selection. When inserted, the shapes are scaled horizontally to the time selection and vertically to the parameter range. If there is no time selection, the shapes will be scaled horizontally to fit the current grid size.
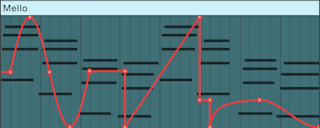
To insert an automation shape at the insert marker or into a time selection, open the Envelope Editor’s or automation lane’s context menu and choose a shape. The top row contains common waveforms: sine, triangle, sawtooth, inverse sawtooth, and square. The bottom row contains two sets of ramps and an ADSR shape.
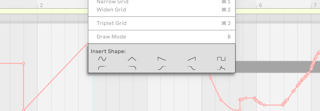
Waveform and ramp shapes behave slightly differently. Waveforms are always inserted as is, regardless of the surrounding parameter values. Ramps are inserted according to the parameter values on either side of the selection, as indicated by the dotted lines in their shape icons. This means that the exact appearance of the shape depends on the parameter values surrounding the insertion point.

Note that when working with parameters which can only be set to discrete states rather than a continuous range, such as toggles or radio buttons, you can only insert the square automation shape.
26.7 Editing Automation
You can make changes to existing automation envelopes in the Envelope Editor or automation lanes by editing breakpoints with the mouse or keyboard, or by stretching, skewing, or simplifying envelopes.
26.7.1 Editing Breakpoints and Segments
You can use the mouse to adjust breakpoints and automation envelope segments.
To move a breakpoint, click and drag it to the desired location. When dragging a breakpoint, a thin black vertical line appears to help you see where the breakpoint is positioned in relation to the grid lines.
Breakpoints automatically snap to grid lines, but you can bypass grid snapping by holding Alt (Win) / Cmd (Mac) while dragging. Hold Shift while dragging horizontally to restrict movement to the horizontal axis.
To delete a breakpoint, simply click on it. The envelope is then adjusted to accommodate the change: the breakpoints on either side of the deleted one become automatically linked via a new envelope segment to compensate for the deletion.
You can make adjustments to multiple breakpoints by creating a selection. To do so, click and drag in the Envelope Editor’s or automation lane’s background. You can move the selection by dragging one of its breakpoints or delete the breakpoints in the selection by selecting the Delete option from a breakpoint’s or selection’s context menu.
Apart from adjusting individual breakpoints, you can also make adjustments to automation envelope segments, i.e., the lines between breakpoints. To move a line segment, click and drag near (but not on) the segment. Alternatively, hold the Shift key, click directly on a line segment to select it and hold the left mouse button, then release the key and drag the segment to the desired location. Holding Shift while dragging vertically allows you to adjust the line segment’s position at a finer resolution. Hold Shift while dragging horizontally to restrict movement to the horizontal axis.
If the line segment you are dragging is a part of time selection, Live will insert breakpoints at the selection’s edges and move them with the segment. When the segment is moved out of the time selection, additional breakpoints are inserted at the selection’s edges.

Dragging and dropping a breakpoint or line segment on top of existing breakpoints will overwrite those breakpoints. You will also notice the following behavior as you continue dragging, and before you drop: any existing parts of the envelope will not be permanently overwritten until you finally drop the part you are moving onto its new location.
You can add a curve a line segment by holding Alt (Win) / Option (Mac) and dragging the segment. Note that you can only add curves to diagonal segments. Double-click while holding Alt (Win) / Option (Mac) to change a segment from a curved to straight line.
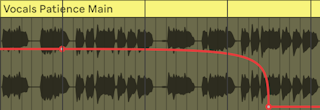
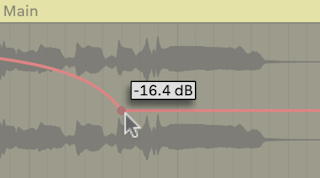
To help you edit envelopes more precisely, parameter values are shown when you create, hover over, or drag breakpoints. When hovering over or dragging a line segment, the parameter value shown corresponds to the breakpoint closest to the cursor. Holding the Shift key while dragging a breakpoint vertically allows you to adjust the parameter value at a finer resolution.
To set an exact value for a breakpoint or segment, choose the Edit Value option from the breakpoint’s or segment’s context menu, then type in the value with your computer keyboard. If multiple breakpoints are selected, the change will apply to the breakpoint whose value you edited, and the other breakpoints will be moved relatively.
To learn how to edit breakpoints with the keyboard, check the Editing Automation and Modulation Envelopes section of the Accessibility and Keyboard Navigation chapter.
26.7.2 Stretching and Skewing Envelopes
When hovering over a time selection, handles appear around the outer edges of the selection. Clicking and dragging these handles allows you to transform the segment of the automation envelope that lies within the selection.
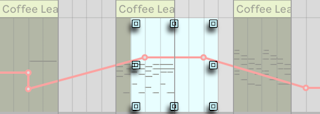
While dragging the handles, an outline appears to indicate the amount of stretching or skewing. The outline snaps to grid, but you can hold Alt (Win) / Cmd (Mac) while dragging horizontally to bypass grid snapping. If you have already dragged the handles to transform the shape of the envelope, the outline will reflect that when you hover over the handles.
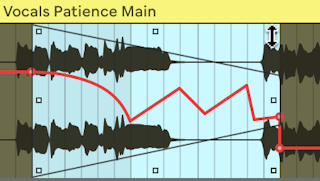
Dragging the center handles at the top and bottom lets you stretch the envelope segment along the vertical axis. Holding Shift allows you to make finer adjustments. Drag the center handles at the left and right to stretch the envelope horizontally. Dragging any of the corner handles lets you skew the segment.
If you drag any handle while holding Alt (Win) / Option (Mac), the movement will be mirrored in the opposite handle, as if you were dragging them both simultaneously in opposite directions.
Note that dragging a handle over existing breakpoints outside the time selection will remove them.
26.7.3 Simplifying Envelopes
If your automation envelope has a lot of breakpoints representing minute changes to a parameter’s value, you can reduce their number with the Simplify Envelope option. This calculates the optimal number of breakpoints needed to represent the selected automation envelope, and removes any unnecessary breakpoints by replacing them with straight lines or curved segments where appropriate. To simplify an envelope, make a time selection around a segment, then choose Simplify Envelope from the context menu.

26.8 Deleting Automation
To delete all automation data for a parameter, open the parameter’s context menu and select the Delete Automation option. You can also select a parameter and use the CtrlBackspace (Win) / CmdDelete (Mac) keyboard shortcut. Once you delete automation for a parameter, the automation LED disappears, and the parameter value returns to its default.
You can also remove automation data with the context menu options in the Envelope Editor or automation lane headers. The following options are available:
- Clear Envelope removes the envelope for the selected parameter.
- Clear All Envelopes of… removes the envelopes for all of the automated parameters in the selected device. This option is only available in automation lane headers.
- Clear All Envelopes removes all automation data in the Set.
Instead of removing all automation data, you can also delete parts of an automation envelope by editing breakpoints and segments.
26.9 Additional Tips for Working with Automation
26.9.1 Automating the Tempo
In Live, the tempo is just another control that can be automated. Any changes you make to the tempo in the Control Bar while Arrangement recording will be saved as an automation envelope. You can also create an envelope for the tempo in an automation lane.
To create or view the tempo automation envelope, open the Arrangement View, enable Automation Mode, and navigate to the Main track’s automation lane. Then, choose Mixer from the Device Chooser and Song Tempo from the Automation Control Chooser.
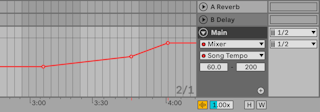
You can use the Tempo Minimum and Maximum Range sliders to set the minimum and the maximum of the tempo range displayed in the envelope, in BPM. Note that these two controls also determine the value range of a MIDI controller assigned to the tempo.
26.9.2 Locking Envelopes in Automation Lanes
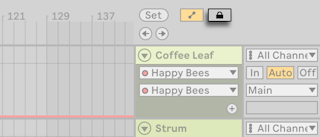
When you move Arrangement View clips, Live moves automation data with the clip. Sometimes, you might want to lock the envelopes to the timeline position rather associate them with the clips. You can achieve this by enabling the Lock Envelopes toggle or by selecting Lock Envelopes in the Options menu.
26.9.3 Using Edit Menu Commands
You can use the Edit menu commands when working with automation data. If you make a time selection within an automation lane, the Cut, Copy, Duplicate, or Delete commands will only apply to the part of the envelope within that selection; the clip itself and other parts of the envelope will be unaffected. You can also create time selections spanning multiple automation lanes; the Edit menu commands will apply to all envelopes within the selection in that case.
Note that Live allows you to copy and paste envelope segments not only from one point in time to another, but also from one parameter to another. Since the parameters may be completely unrelated, this can have unexpected (but possibly interesting) results.