Lesson: First Steps in Session View
Lesson overview
Ableton Live’s clip-based Session View can be a great entry point into using the DAW. Here, music makers can experiment and explore musical ideas without committing to a structure. In this lesson, students are introduced to the process of making music in Session View. They navigate the user interface and use a collection of audio clips to create their own unique music.
Learning intentions
- Technology literacy – effectively navigating the browser and launching clips
- Critical thinking – considering how combinations of sounds create music
- Critical listening – identifying how musical elements can be combined
- Creating and making – developing musical ideas
Preparation (10-15 mins)
- Check that video resources are accessible via your network
- Load First Steps in Session View Live Set to use for teacher demonstration
- Have the First Steps in Session View Live Set available to students
- Ensure that the LoopMasters Mixtape Pack* is authorized on devices
- Have the Working with Clips in Session View guide available to students
In the classroom (50-80 mins)
- Step 1: Introduction to Ableton Live’s Session View, looking at the user interface, terminology and global controls (10-15 mins)
- Step 2: Task explanation – show students how to use the browser to find, import and launch clips, demonstrating with the included First Steps in Session View Live Set (5-10 mins)
- Step 3: Practical task – students spend time importing clips from the browser and making different combinations as scenes in Session View (30-45 mins)
- Step 4: Wrap up – students share their musical ideas with the class (5-10 mins)
* Note that the construction kit clips used in this project come from LoopMasters Mixtape Pack, available for Live Intro and above. If using Live Lite these files will not be available so consider using a different set of audio loops.
Introduction: Understanding Session View
Ableton Live’s Session View has a non-linear workflow that allows music makers to explore ideas without a defined start or end point – a fun and intuitive way to start making music right away. Artists around the world use Session View as a way to perform their music live.
Understanding the interplay between clips, tracks and scenes, and how to navigate the browser, tempo and transport controls provides the groundwork for this future learning.
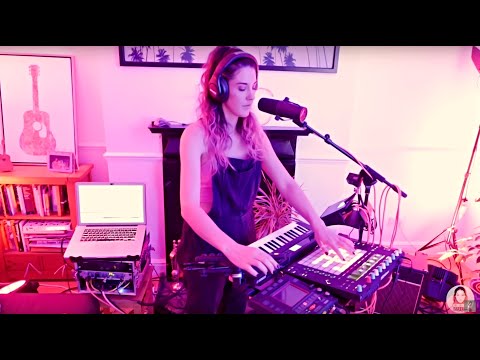
Rachel K Collier – Ableton Live Push 2 Performance – Tattoo
Artists across the world use Ableton Live’s Session View on stage and in the studio. This video by Rachel K Collier is an excellent example of how Session View, in conjunction with MIDI hardware, can be used as a flexible performance tool.
Questions to help frame a discussion:
- What do you see happening in this video?
- What is the artist using to create this music?
- Can you see a connection between the controllers she is using and the sounds you hear?
- What do you think the computer is doing?
Don’t panic! Ableton Live explained…
Between 3m20s and 4m12s in this video, the key concepts of clips, tracks and scenes are explained in a straightforward way.

Navigating Session View
The main central section of Ableton Live’s interface may look a little like an excel spreadsheet, but this is where a lot of music-making happens. This guide explains the building blocks of music-making within Session View.
Guide: Navigating Session View
Ableton Live’s browser
The browser is where you can find all the ingredients you need to create music using Ableton Live. This guide provides information on each of the sections and some strategies for navigating it.
Guide: Ableton Live’s browser
Practical Task: Music-Making in Session View
Live’s Session View can be used as a place to explore musical ideas by combining different parts without a predefined start or end.
In this practical task, students choose sounds from a selection of included audio clips. They combine them in Ableton Live’s Session View, creating unique combinations of sounds to share with their peers.
“The included Live Set has four tracks – Drums, Bass, Music Loops and Other. I like to explain to students that each track is like a ‘member of the band’ (drummer, bass player etc…) and the sounds they drag to each track need to correspond with what that ‘band member’ is supposed to be playing” — Matt Ridgway
Task steps:
- Open the included Live Set and locate the audio clips in the browser's Current Project
- Audition the included audio clips by selecting and using the right arrow
- Select and drag chosen clips onto corresponding tracks (eg. drum sounds to Drums track)
- Try changing the tempo to hear if it sounds better at a different BPM
- Follow some of the suggested creative clips workflows in the Working with Clips in Session View guide
- Create scenes of clips that work together
- Share and discuss musical ideas
First Steps in Session View - Live Set
This Live Set can be used by the teacher to demonstrate techniques and by students as a starting point.
Download: First Steps in Session View – Live Set
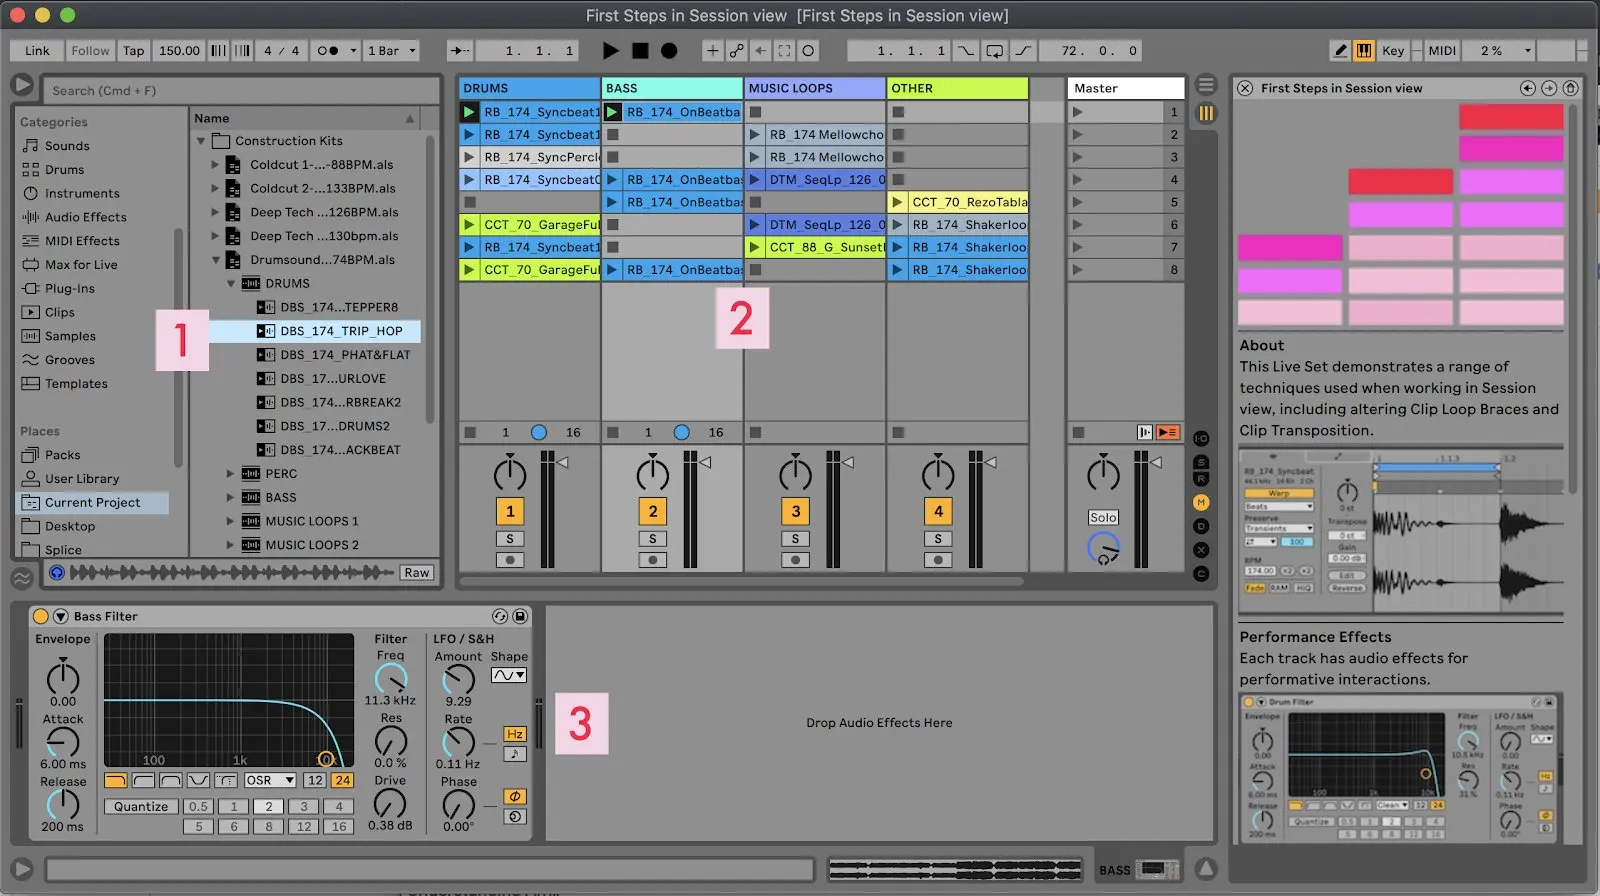
- ‘Current Project’ contains Construction Kits: sets of audio clips designed to work well together
- Session View set with four channels
- Simple performance audio effects added to each channel
Working with Clips in Session View
The Working with Clips in Session View guide provides useful shortcuts and techniques for creative clip workflows that can be shared with students or explained in class.
Classroom Tip: Strategies for sharing students’ work
Practical tips for how work is shared
- “Pass the aux-cable” style playback of student musical works
- A verbal reflection of the process undertaken
- Collect all and save then upload to cloud or local LMS
- Record clip-launching into the Arrangement View and export audio
- Drag scenes to Arrangement View and export as audio files
Prompts for students
- Talk about the sounds you have chosen.
- What clips sound best together?
- Why do some combinations of clips work better than others?
“Encouraging students to share and talk about their work in front of their peers provides an opportunity for students to feel engaged, positive and connected to their music-making.” — Matt Ridgway
Delve Deeper: Additional resources
Packs on Ableton.com
There are more construction-kit style packs freely available on Ableton.com
Explore: Free loop-based Packs
Recording from Session View into Arrangement View
One unique workflow of Ableton Live is that you can record a Session View performance into the Arrangement View. This is an excellent way to close this lesson and lead into the First Steps in Arrangement View lesson.
This guide provides a number of additional resources to support this workflow.
Guide: Recording from Session View into Arrangement View
“When I do this project with students, I create an arrangement by recording clip triggering and automation from Session View into Arrangement View.
I usually make mistakes, which leads to an opportunity to start talking about editing within the Arrangement View. It has an added benefit of normalising mistake-making… Sometimes the mistakes end up being the best bits!” — Matt Ridgway