Lesson: First Steps in Arrangement View
Lesson overview
In this lesson, students learn how to navigate Ableton Live’s user interface while learning clip editing and automation techniques in Live’s Arrangement View. They create a musical arrangement, add fades, make use of volume and parameter automation, and then export their creation as an audio file to share with peers.
Learning intentions
- Technology literacy – effectively navigate clips, views and the user interface
- Critical thinking – consider how combinations of sounds create music
- Critical listening – identify opportunities to balance sound levels by adjusting volume faders and adding automation
- Creating and making – develop musical ideas
Preparation (10-15 mins)
- Load the First Steps in Arrangement View Live Set to use for teacher demonstration
- Ensure that students have access to the First Steps in Arrangement View Live Set*
- Have the Working with Clips in Arrangement View and Automation in Arrangement View guides available to students
In the classroom (50-75 mins)
- Step 1: Introduction to navigating Arrangement View (5 mins)
- Step 2: Demonstration of importing clips and sequencing loops across the arrangement (5-10 mins)
- Step 3: Practical task – students drag clips from the browser into Arrangement View to develop a musical work (10-20 mins)
- Step 4: Demonstration of drawing in clip fades and parameter automation (5-10 mins)
- Step 5: Practical task – drawing automation into Arrangement View (10-15 mins)
- Step 6: Wrap up – students export and share their musical ideas with the class (5-10 mins)
Activity Option:
* If students have already worked with a combination of clips in Session View, they may want to use their previous Live Set as a starting point and could consider recording clips from Session View into Arrangement View as outlined here.
Introduction: Understanding Arrangement View
Ableton Live’s Arrangement View is the place in which you can create and develop a musical work along a linear timeline. Understanding the visual layout of Arrangement View, and identifying how clips can be arranged linearly is the first step.
This lesson uses collections of audio clips that work nicely together, sometimes referred to as “construction kits”. The focus is on developing an understanding of how clips can be placed in tracks and then arranged on the timeline.
Tip: Set up the classroom with speakers and a projector and do a walk-through of the First steps in Arrangement View Live Set as inspiration.
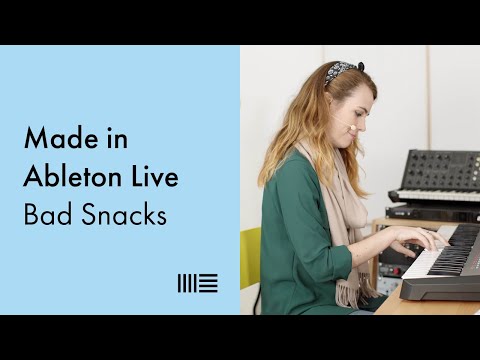
Made in Ableton Live: Bad Snacks
This video provides a fantastic overview of how Bad Snacks creates a track from scratch in Ableton Live’s Arrangement View.
The linked section starting at 25m:26s gives a glimpse into how clips are laid out in Arrangement View, and how song structures are mapped across the timeline.
Navigating Arrangement View
Clips are the building blocks of music-making in Ableton Live. This visual guide explains how tracks house the clips that are positioned along the timeline in Arrangement View.
Guide: Navigating Arrangement View
Ableton Live’s Browser
The browser is where you can find all the ingredients you need to create music using Ableton Live. This guide provides information on each of the sections and some strategies for navigating it.
Guide: Ableton Live’s Browser
Practical Task: Clips and automation in Arrangement View
You can develop a musical arrangement along a timeline in Live’s Arrangement View. Clips can be edited, arranged and placed together in different combinations.
In this practical task, students select audio clips and import them into Ableton Live’s Arrangement View. They explore how to place the clips along a timeline, add fades and apply simple automation.
Task steps:
- Open the included Live Set and locate the audio clips under Current Project in the browser
- Audition the included audio clips by selecting and using the right arrow.
- Select and drag chosen clips to each corresponding track (ie. drums to Drum track, bass to Bass track, etc.)
- Follow the suggested workflows in the Working with Clips in Arrangement View guide
- Create a simple arrangement or musical form
- Follow the suggested workflows in the Automation in Arrangement View Guide
- Export and share work with the rest of the class
“The included Live Set has four tracks – Drums, Bass, Music Loops and Other. I like to explain to students that each track is like a ‘member of the band’ (drummer, bass player, etc.) and the sounds they drag to each track need to correspond with what that ‘band member’ is playing” — Matt Ridgway
First Steps in Arrangement View - Live Set
This Live Set can be used by the teacher to demonstrate techniques to students in class or as a starting point for students to work from.
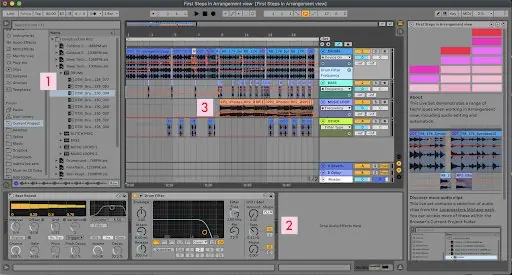
- ‘Current Project’ contains Construction Kits: sets of audio loops designed to work well together
- Example four-track arrangement with audio edits
- Examples of automation of audio effects
Working with clips in Arrangement View
This guide provides a step-by-step description and visual guide on how to find, drag and arrange the supplied construction-kit clips from Live’s browser into the Arrangement View timeline.
Guide: Working with Clips in Arrangement View
Automation in Arrangement View
When an arrangement has been ‘blocked out’, one next step is to add automation. Through doing this, you can add movement and interest throughout the musical arrangement.
This guide explains how to add and edit automation in Live’s Arrangement View.
Guide: Automation in Arrangement View
Exporting Audio
When the arrangement is complete it’s time for your students to export their audio. This guide explains how to access Ableton Live’s export function and some of the options available.
Guide: Exporting Audio
Essential Shortcuts
Developing a quick workflow will keep you in the zone while editing in the Arrangement View. These shortcuts are useful to incorporate into your practice from early on.
Guide: Essential Shortcuts
Classroom Tip: Developing aesthetic decision-making
One goal for this project could be for students to begin to think critically about song form and musical structures – to be able to critically listen to different combinations of sonic elements and develop an understanding of why some work together better than others, and how they may develop over time.
When doing this task, look to see if students can...
- Describe what clips they do and don’t like and why
- Explain why some combinations of clips work better than others
- Consider what parts they could add, subtract or change
- Develop an arrangement that has a shape and alters over time
“Providing opportunities for students to use critical listening and make their own aesthetic decisions is key to the development of music-making skills.” — Matt Ridgway
Focus Questions
- What sounds stick out to you?
- Which part of your arrangement do you like the most?
- Why have you chosen to put the clips in that order?
- How does your musical arrangement evolve and change over time?
- How can you mark transitions between sections?
- Why did you choose the sounds you did? Did you change any of them? Why?
Delve Deeper: Additional resources
Play with Song Structures
Ableton’s Learning Music website provides a range of resources for developing foundation knowledge on song form and arrangement.
Explore: Play with Song Structures

Arranging as a Subtractive Process
Making Music: Creative Strategies for Electronic Music Producers provides some great strategies for overcoming roadblocks in creating an arrangement. This linked strategy is around carving out arrangements and can be an excellent starting point for students.
Read: Making Music – Arranging as a Subtractive Process
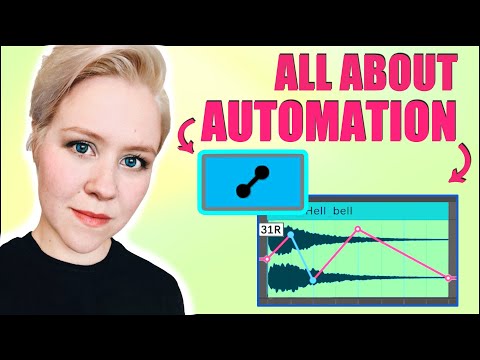
All About Automation in Arrangement View
While going deep into automation is not in the primary scope of this project, some students may want to know more. This easy-to-digest video by LNA goes a little deeper into how automation works in the Arrangement View.